|
This started
out as a project to make a new breast pad for an incomplete Rusby
breast drill that was intended as a Christmas present for a
friend. I successfully copied the old breast pad from another
Rusby drill by welding the flat portion onto the end of a piece of pipe
after appropriate shaping & machining of each part.
Then I was faced with the dilemma that the old breast pad was bent long ago by some former user.
Being a graduate metallurgist, I correctly reasoned that the original
breast pad must be malleable iron, as it would simply have broken
rather than bending if it had been made of grey iron. Therefore,
I reasoned, if it bent once, I ought to be able to bend it again in
order to return it to its former shape.
Being somewhat cautious, I also reasoned that I really ought to preheat
the breast pad before bashing it into straightness, as I could not
reliably determine whether its ductile-brittle transition temperature
was below or above room temperature. "It ought to be less brittle
at red heat" was my next reasoned step.
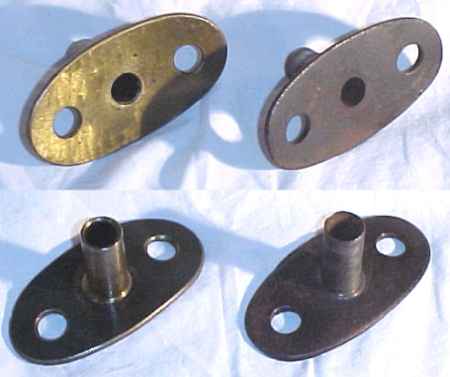
The new breast pad is at left, which you can tell by the machined
inside bevel in the pipe. The old breast pad at right has no
bevels, just rounded edges.
Oh yeah - the other reason that so many Rusby drills have lost their pads is because they're so easy to remove.
|
The bending process is summarized below:
|

|

|
|
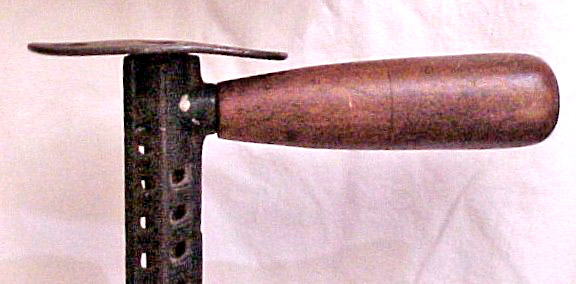
Above: Bent old Rusby breast pad.
|
Breast pad lying on vise jaws; wood block and large hammer at the ready; propane torch about to be lit.
|
Breast pad at red heat - really bad picture, as there was insufficient light from the barely red breast pad.
|
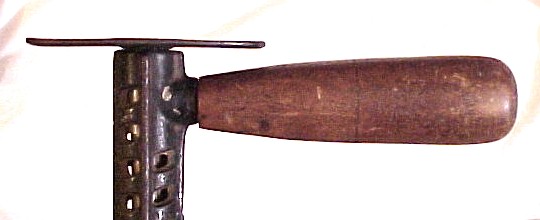
I
did not quite have the nerve to hit the breast pad so hard that it
would overbend - the malleable iron is not all that ductile, so it's
not yet perfectly straight. Straight enough !
|
|